Table of Contents
Need to turn a video into text? With a good video to text converter, you can get accurate transcripts, captions, and ready-to-use content from any video in minutes, not hours.
Success means getting a clean, searchable, and repurposable text file from your webinars, interviews, or social videos. This allows you to create blog posts, social media updates, and accessible captions without tedious manual work.
This guide is a step-by-step workflow. We'll cover how to get a highly accurate transcript, polish it, and export it in formats like SRT for captions or plain text for articles, so you can put your content to work immediately.
Why Converting Video to Text Is No Longer Optional
The simple act of turning video into text is a massive force multiplier for your entire content strategy. It's the critical first step in making your message more discoverable, accessible, and easy to share.
Without a text version, all the valuable insights in your video are completely invisible to search engines and locked away from audiences who prefer reading or have hearing impairments.
You can see this shift happening in the market itself. The boom in video-to-text tools is directly tied to the explosion of AI transcription and speech-to-text technology over the last few years. According to industry research, the global AI transcription market hit $4.5 billion in 2024 and is expected to rocket to $19.2 billion by 2034—more than quadrupling in a decade.
This kind of growth isn't just a trend; it shows that automating the video-to-text process is becoming a fundamental part of how modern content gets made.
The Strategic Benefits of a Text-First Approach
When you build a video-to-text workflow into your process, you get immediate and long-term wins that go way beyond just having a transcript. It truly changes how you create and distribute your content.
- Boost Your SEO: Search engines can't watch videos, but they are incredibly good at crawling text. A full transcript on your website gives Google rich, keyword-dense content to index, helping you rank for the specific topics you covered in your video.
- Increase Accessibility: Captions and transcripts open up your content to a much wider audience, including people with hearing disabilities and non-native speakers. It’s an inclusive move that also just makes for a better user experience for everyone.
- Fuel Your Content Engine: A single one-hour webinar can be chopped up into the source material for dozens of smaller content pieces. You can pull out killer quotes for social media, create detailed show notes, or even draft entire blog posts. This is exactly how to turn one video into a week's worth of content without burning out.
The real goal here isn't just to get a transcript. It's to build a system where every video you produce automatically feeds your entire content calendar, from your blog straight through to your social media channels.
By using a video to text converter, you stop thinking of your video as the final product. Instead, it becomes the raw material for a huge range of marketing assets.
Your Workflow for Using a Video to Text Converter
Let's get into the practical steps of turning your video content into high-quality text. The goal is a repeatable system you can use every week to feed all your content channels.
For this walkthrough, we'll use Flowjin, an AI platform for busy creators and marketers that turns long-form video into social-ready clips and written content.
This flow chart shows how a single video can become the source for your entire text-based content strategy.
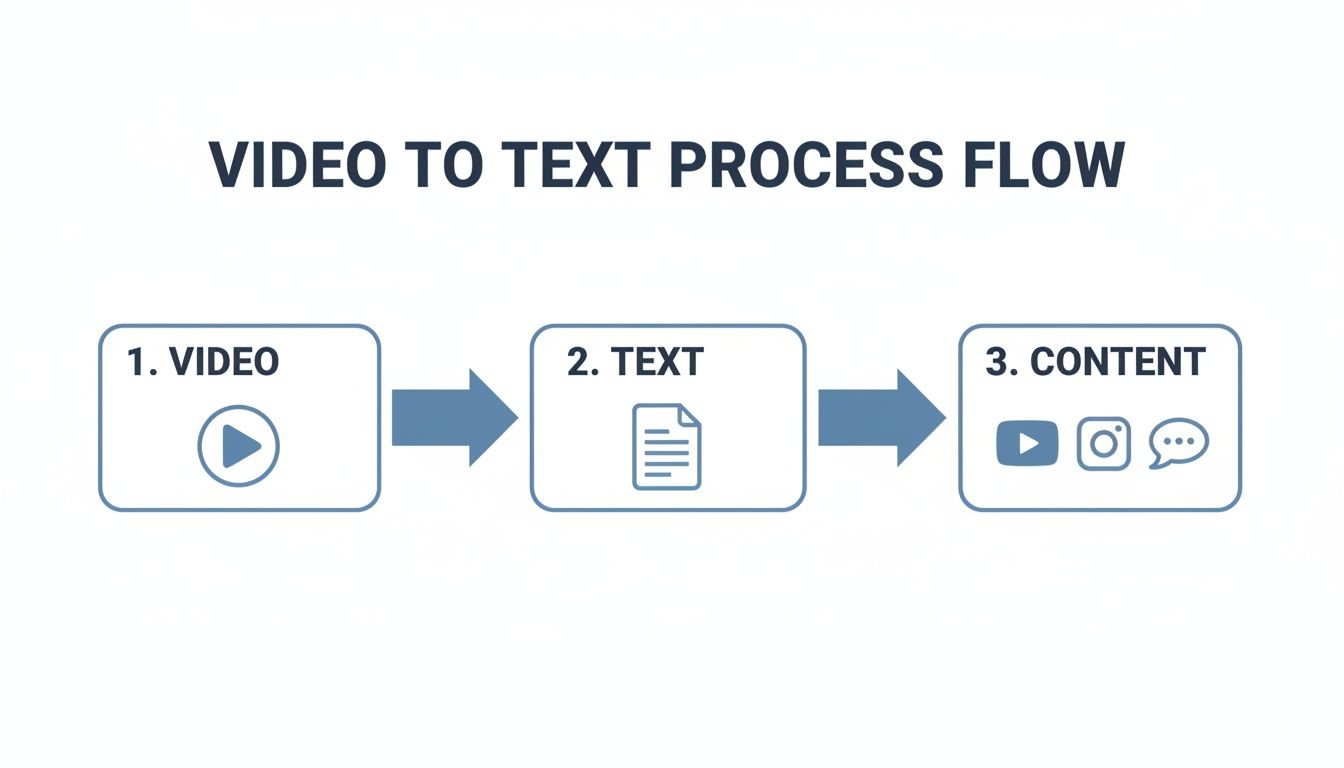
The key takeaway? The initial conversion from video to text unlocks dozens of other opportunities to create more content downstream.
Step 1: Upload Your Video
First, you need to get your video into the converter. With a modern video to text converter like Flowjin, you have two simple options:
- Upload a File Directly: If you have the video file (.mp4, .mov, etc.) on your computer, just drag and drop it into the platform. This is perfect for freshly edited interviews or webinar recordings.
- Paste a YouTube Link: For content that's already published, grab the YouTube URL and paste it in. Flowjin pulls the video directly, saving you the hassle of downloading it first.
While some workflows require you to efficiently extract audio from video before you can get a transcript, tools like Flowjin handle all that behind the scenes.
Step 2: Configure Your Settings for Accuracy
Before you start the transcription, a few settings make a massive difference in quality. Spending ten seconds here will save you minutes of editing later.
First, select the primary language spoken in the video. Most tools can auto-detect this, but explicitly choosing the language improves accuracy, especially with regional accents.
Next, enable speaker diarization. This feature automatically identifies who is speaking and when. For any interview, podcast, or panel discussion, this is a game-changer. It transforms a wall of text into a clean, readable script with clearly marked speakers (e.g., "Speaker 1," "Speaker 2").
Pro Tip: Don't skip these settings. A properly configured transcription run is the difference between a 90% accurate transcript that needs heavy cleanup and a 98% accurate one that's nearly ready to publish.
Step 3: Review and Polish Your Transcript
Once Flowjin works its magic—which usually takes a few minutes—you'll get a full, time-stamped transcript inside an interactive editor. While the AI is powerful, a quick human review is smart to catch any jargon, brand names, or proper nouns.
The editor lets you click on a word to type a correction. You can also merge paragraphs, fix punctuation, and assign the correct names to speakers. The goal is a quick once-over to ensure the text is polished and professional before you hit export.
Choosing the Right Text Format for Your Goals
Getting an accurate transcript is just the starting line. The real magic happens when you export that text into different formats, because each one is built for a specific job.
This process sits at the intersection of video's dominance and reliable speech-to-text tech. It's no surprise that 91% of businesses now use video for marketing, with 93% of marketers calling it a fundamental piece of their strategy. You can explore the latest video marketing statistics to see just how central it's become.
This means every video you create is a potential goldmine for text-based content—from captions to full-blown articles.
Formats for Captions and Accessibility
When you need to add closed captions for platforms like YouTube, LinkedIn, or Instagram, you need a time-coded file. These formats ensure your text appears on screen exactly when the words are spoken.
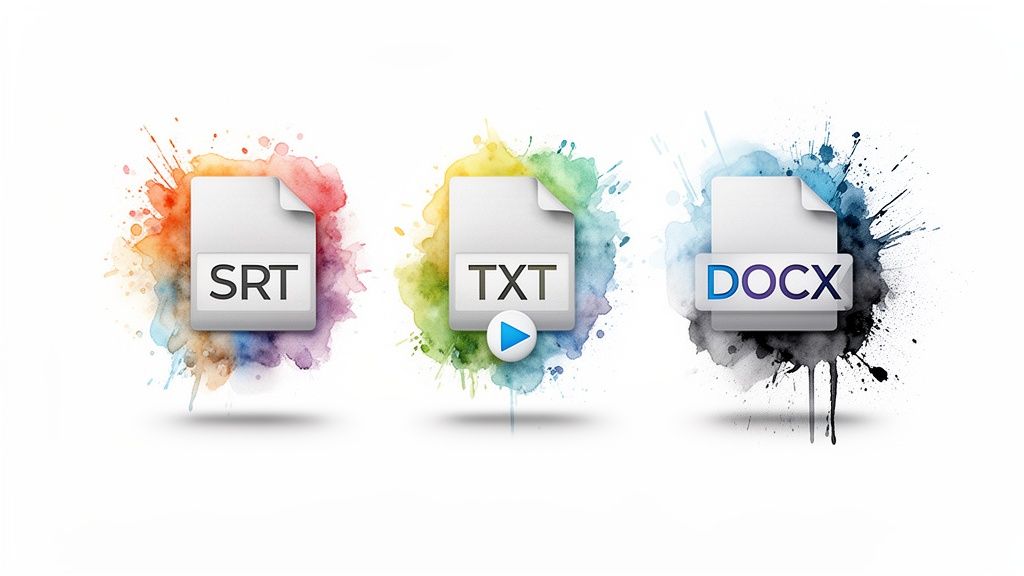
- .SRT (SubRip Text): This is the industry standard. It's the most common and universally supported caption format. It’s a simple text file with numbered subtitle blocks, precise timecodes, and the caption text.
- .VTT (WebVTT): The modern successor to SRT, VTT offers more advanced styling options like bolding text or changing caption placement. It's the go-to for HTML5 video.
Either choice is essential for reaching the 85% of social media users who watch videos with the sound off.
Formats for Content Repurposing
If your goal is to turn your video into a new asset—like a blog post, guide, or show notes—you'll want a straightforward text format.
- .TXT (Plain Text): This is your no-frills, straight-up transcript. Just the words. It’s perfect for copying and pasting into other applications or feeding into AI tools for summarization.
- .DOCX (Word Document): Exporting to DOCX gives you more structure. It often keeps speaker labels and paragraph breaks intact, providing a fantastic head start when turning a conversation into an article.
These formats are your direct path to repurposing. A 30-minute webinar transcript in a .docx file is essentially the first draft of a 1,500-word blog post.
To make the decision easier, this table breaks down the most common formats and where they shine.
Beyond Files: Automated Social Copy
Modern platforms like Flowjin are moving beyond simple file exports.
Instead of just giving you a transcript, Flowjin analyzes your video to pinpoint the most compelling, shareable moments. From there, it automatically drafts social media copy for you.
Imagine getting ready-to-post tweets, LinkedIn updates, and video descriptions generated directly from your video's most powerful insights, complete with relevant hashtags. This is where a video to text converter stops being a utility and becomes a true content engine.
Put Your Transcript to Work as Social Media Content
Don't let that perfectly good transcript collect digital dust. The text you just generated is a goldmine—packed with quotes, insights, and conversation starters ready for your social media feeds.

The idea is to create a content engine where one long-form video can fuel your entire social calendar for days or weeks. This is how you boost your output without spending extra time in front of the camera.
Find and Share Your Best Quotes
The fastest win from any transcript is to pull out punchy, memorable quotes. Scan the text for sentences that pop—the ones that are insightful, a little controversial, or hit an emotional nerve.
Once you’ve found a few gems, you have options:
- Keep it Simple: Copy and paste the quote directly into a tweet or LinkedIn post. Add your own context and tag the speaker.
- Make it Visual: Use a simple design tool like Canva and drop the quote onto a branded background. These visual posts are great for engagement on Instagram and Facebook.
You can even use tools like Flowjin to automatically create YouTube to Instagram Reels quotes, combining the visual appeal of video with the power of a great text-based insight.
Match Your Content to the Platform
Your transcript is an outline for more detailed social content. Remember to tailor your approach for each platform.
Video marketing research shows that 71% of marketers see the sweet spot for engagement in videos between 30 seconds and 2 minutes. This reinforces the need to break down longer content into smaller, digestible pieces, including text-based assets.
Key Takeaway: Stop thinking of your transcript as just a record of what was said. It's an outline for what you can say next. Every major talking point can become its own dedicated post.
Let AI Do the Heavy Lifting for You
Manually sifting through a long transcript to find the best moments and then drafting all those posts still takes time. This is where a smarter video to text converter becomes a content partner.
Flowjin is designed for this exact purpose. Instead of just handing you a text file, it analyzes your video to pinpoint the most interesting, shareable moments.
From there, Flowjin automatically drafts posts specifically for different platforms—complete with relevant hashtags and calls to action. It can turn a key insight into a sharp, concise tweet or expand on a powerful story for a thoughtful LinkedIn post. This automation closes the gap between having a transcript and having a full social media calendar, freeing you up to focus on engaging with your community.
Simple Ways to Improve Your Transcription Accuracy
While AI-powered converters are impressively smart, their accuracy depends on the audio you feed them. A few small habits can dramatically boost your transcript's quality right from the start, saving you editing time.
These aren't complex technical fixes. They’re simple, practical adjustments to how you record that pay off big time. When you give the AI the cleanest possible audio, you’re setting it up for success.
Nail Your Recording Environment
Your recording space is the single biggest factor affecting audio quality. Background noise is the enemy of accurate transcription.
You don't need a professional studio. Just take these simple steps:
- Find a quiet room. Pick a spot away from street traffic, buzzing appliances, or coworkers. Rooms with soft surfaces like carpets and curtains are fantastic for soaking up echo.
- Use a decent mic. Your laptop's built-in microphone will work, but even a budget-friendly USB or lavalier mic makes a world of difference.
- Minimize interruptions. A quick heads-up to family or colleagues can go a long way. Don't forget to silence your phone and computer notifications.
For those looking to go a step further, applying advanced noise reduction techniques for video is a game-changer. Clean audio is the foundation of a great transcript.
Speak for the AI
It's not just where you record, but how you speak that matters. AI models do their best work when the input is clear and predictable.
A little attention to your delivery goes a long way:
- Speak clearly and enunciate. Mumbling or talking too fast causes words to blur together. Take a breath and speak deliberately.
- Keep a steady pace. Rushing through your content is a surefire way to introduce errors. A natural, conversational pace is perfect for any video to text converter.
- Avoid crosstalk. If you're recording an interview, try to let one person finish before the next one starts. Overlapping dialogue is one of the toughest challenges for any transcription service.
The goal is to make the AI's job as easy as possible. The more effort you put into a clean recording, the less time you'll spend fixing mistakes later.
Manage Multiple Speakers and Accents
When your video has more than one person speaking, you'll want a tool that offers speaker diarization. This feature automatically figures out who is speaking and labels their lines (e.g., "Speaker 1," "Speaker 2"). It's a must-have for podcasts and interviews. Platforms like Flowjin do this automatically.
For speakers with strong accents, audio clarity becomes even more critical. A good microphone placed close to the speaker will capture their voice cleanly, giving the AI the best possible chance to interpret their words correctly. This is also a huge help when you're pulling audio from different sources where quality varies, like finding the best Twitter Space transcriber. Prioritizing clean audio from the start is the key to an accurate, useful transcript.
Let's Tackle Some Common Questions
If you're just getting started with video to text converters, you probably have a few questions. Here are the most common ones, with straight-up answers.
Just How Accurate Are These AI Converters?
The short answer is: surprisingly accurate. Modern AI can hit up to 98% accuracy with clean audio.
Of course, "clean audio" is the key. The final quality depends on how clear the original audio is, whether there's background noise, and the speakers' accents.
For the best results, use a decent microphone and record in a quiet spot. I always recommend a quick two-minute proofread to catch industry jargon or specific brand names the AI might miss.
Can I Really Just Use a YouTube Link?
Yes! And it’s a game-changer. Many of the best converters, including Flowjin, let you import a video just by pasting in the YouTube link.
This means no more downloading massive video files just to upload them again. The platform grabs the video directly from the source. It's a massive shortcut for repurposing content that's already live, like webinars or interviews.
What’s the Real Difference Between a Transcript and Captions?
Great question. They have totally different jobs.
A transcript is the raw text of everything spoken, laid out in a simple document. This is what you'll use to create blog posts, show notes, or have a searchable record of what was said.
Captions are the timed text chunks that appear on the screen while the video plays (in an SRT or VTT file). Captions are non-negotiable for accessibility and for grabbing the attention of people watching with the sound off.
A solid video to text converter should give you both.
How Long Does This Actually Take?
It's much faster than you think. A good AI tool can process a video 3 to 5 times faster than the video's actual length.
For example, a one-hour webinar can often be fully transcribed and ready in about 15 to 20 minutes.
This speed changes the content game. You can start repurposing your material almost as soon as you finish recording.
Ready to stop transcribing and start creating? Flowjin turns your videos into accurate transcripts, social media clips, and written content in minutes. Try Flowjin for free and see how much time you can save.